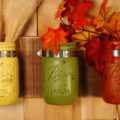
Hey, Lovelies! Fall is in full swing and we are bringing all of the loveliness of fall indoors with these fun DIY fall mason jars. These fall mason jars have a little bit of rustic, a little bit of sparkle and a lot of cute details. There are a lot of textures that are so great for fall, like plaid, burlap, and leaves. There are so many great colors to work with too. Coopers, golds, reds, oranges and champagnes, they are all warm, cozy and intimate. Exactly what fall is all about! We are going to show you how to make these festive DIY fall mason jars. They are all super easy! All are 5 steps or less to complete.
Gold Beaded Fall Mason Jar
{We love the shimmer and texture of this fall mason jar. It is super unique, yet so pretty! We could totally see this as a vase for fall flowers or with a candle inside to make it glow.}
Here is what you need:
• Smooth Ball Jar
• Gold Seed Beads
• Silver Seed Beads
• Champagne Seed Beads (available in-stores)
• Mod Podge
• Sponge Brush
• Chocolate Raffia
• Corn Maple Leaf Pick (in seasonal floral section)
Put It Together
Step 1 – Sponge brush mod podge on small vertical sections of the jar.
Step 2 – Mix together seed bead colors on a tray, plate or bowl. Sprinkle over the sticky Mod Podge painted section capturing loose beads in the tray, play or bowl below.
Step 3 – Continue small mod podge section and seed sprinkle until the full jar is covered in beads.
Step 4 – Let dry. Once dry finish with Brown Raffia bow and a fall floral pick.
Fall Burlap Wrapped Mason Jar
{We just love the rustic feel of this fall mason jar. The jute with the burlap works so well together. The jute roll has this twig feeling texture to it that we think is so neat. And the little plaid birdie is pretty darn adorable!}
Here is what you need:
• Smooth Ball Jar
• Leaf Stamped Burlap Ribbon (available in-stores)
• Brown Jute Roll
• Brown Plaid Bird (available in-stores)
• Glue Gun
• Hot Glue
• Leaf Pick (in seasonal floral section)
Put It Together
Step 1 – Fold over the edges of the burlap ribbon and hot glue down.
Step 2 -Hot glue burlap ribbon around the center of the jar.
Step 3 – Layer jute roll around the burlap and secure with hot glue
Step 4 – Hot glue little birdie on side of Jar
Step 5 – Finish with leaf floral pick
Plaid Deer Fall Mason Jar
{Plaid is THE pattern this fall and it looks fabulous on a mason jar. We also love deer silhouettes on everything and this golden one is gorgeous. Add in the jute ribbon on top and you have a lovely fall look!}
Here is what you need:
• Smooth Ball Jar
• Red Plaid Scrapbook Paper
• Cricut Air
• Foil Gold Vinyl Cricut Paper (available in-stores)
• Cricut Standard Mat
• Cricut Weeding Tools
• Cricut Transfer Tape
• Jute Twine (available in-stores)
• Glue Gun
• Hot Glue
• Mod Podge
• Berry Leaf Pick (in seasonal floral section)
Put It Together
Step 1 – Cut the paper to the size of the jar and hot glue around jar
Step 2 – Hot glue top of the paper to top rounded part of the jar. Mod Podge Down to hold in place and secure to the jar.
Step 3 – Upload Deer silhouette to Cricut design space and cut with Cricut
Step 4 – Weed Out Deer Image and transfer it to Cricut Transfer Tape
Step 5 – Transfer image onto plaid paper. Tie a jute bow around top of the jar and secure with hot glue. Finish with leaf berry pick.
Hello Fall Mason Jar
This fall jar is my favorite. We love the metallic copper color on the jar and anything with calligraphy words on it always steal my heart.
Here is what you need:
• Smooth Ball Jar
• Martha Stewart Metallic Copper Paint
• Paint Brush
• Cricut Air
• Foil Gold Vinyl Cricut Paper (available in-stores)
• Metallic Black Vinyl Cricut Paper (available in-stores)
• Cricut Standard Mat
• Cricut Weeding Tools
• Cricut Transfer Tape
• Blooming Autumn Butterfly
• Glue Gun
• Hot Glue
• Leaf Pick (in seasonal floral section)
Put It Together
Step 1 – Paint the jar with the metallic paint. We painted it both inside and outside for quick and easy full coverage. Let dry.
Step 2 – While drying; download this Well Hello Fall Free Printable from Nest of Posies.
Step 3 – Upload the image to Cricut design space and cut with Cricut on Black and Gold Vinyl paper.
Step 4 – Weed Out Black Hello Fall sign and transfer it to Cricut Transfer Tape. Apply to dried jar. Be sure fully dry or paint will peel off.
Step 5 – This is a little tricky, but only transfer the gold Hello and the gold leaf from the gold cut that you did. Then apply on top of the black lettering that is on the jar. We found it easier to do this by hand with the letters and leaf than to with transfer tape.
Step 6 – Hot glue butterfly to the side of jar and finish with leaf pick.
Voila! Calligraphy mason jar!
We love all of these fall mason jar looks and they look really good together too. They are each so different yet so lovely in their own way. We totally love incorporating small animal details into almost everyone. They are too cute and Jo-Ann Fabric and Craft Stores has some really cute ones in the Blooming Autumn line right now!
Check here for more inspiration on fall mason jars
Happy Crafting!
